


DRY BASEMENT FLOOR EPOXY KIT
Basement Epoxy Floor Kit
Our Basement epoxy will never peel, crack or discolor like standard floor paints, yields the thickest, hardest high gloss porcelain like finish that's impact resistant and stain proof. Fills in small nicks and hairline cracks! This kit is suitable for even first time users! This kit contains everything needed to easily upgrade your basement floor to a showroom finish. Never repaint your basement floor again! Coverage is up to 600 sq ft. For floors above 600 sq ft and up to 850 sq ft order the 850 sq ft kit. For floors greater than 850 sq ft order the appropriate number of full kits than click continue shopping and order the appropriate number of 850 sq ft kits.
Standard Kit for $549.00 contains the following:
If you would the colored flake look see our Chip & Topcoat Option
For the standard chip coverage order 6-8 lbs of chips, for the extra heavy look order 16 lbs of chips per 600 sq ft of floor.
NOTE: If you have a moisture problem in your slab(moisture coming up from underneath), do not use this epoxy kit! See wet basement epoxy kit. Moisture coming from above the slab will have no effect on the epoxy. If unsure about moisture in your slab, duct tape on all four sides a 4'x4' piece of plastic to the slab. Let sit for minimum of 24-48 hrs. If moisture is present under the plastic then you require the WET BASEMENT EPOXY FLOOR KIT.
Product and floor slab temperature must be above 50 degrees. Remove any oil or grease stains with a degreasing agent. If using acid etch solution, mix etch according to instructions on bottle. Typically you will need 1 gallon of muriatic acid per 400 sf of floor area. Mix 3 gallons of water to one gallon of acid.
Brush in with stiff bristle broom and let stand for 5-10 minutes then rinse thoroughly with clean water. To neutralize sprinkle 1 lb of TSP powder evenly over the etching solution right before rinsing and lightly scrub in. Then rinse the Etching and TSP thoroughly. Let floor dry completely.
If you don't have a drain in your basement and are not using etch solution. Rent the Floor Prep Machine from Home Depot and run it over the floor like a floor buffer. If they have the Vac attachment be sure to get that also since its important to get all the dust off the floor.
It�s important to get the floor CLEAN so as to not have any foreign substances between the epoxy and the concrete which will affect the bonding process. Repeated cleanings may be necessary to achieve a properly clean floor.
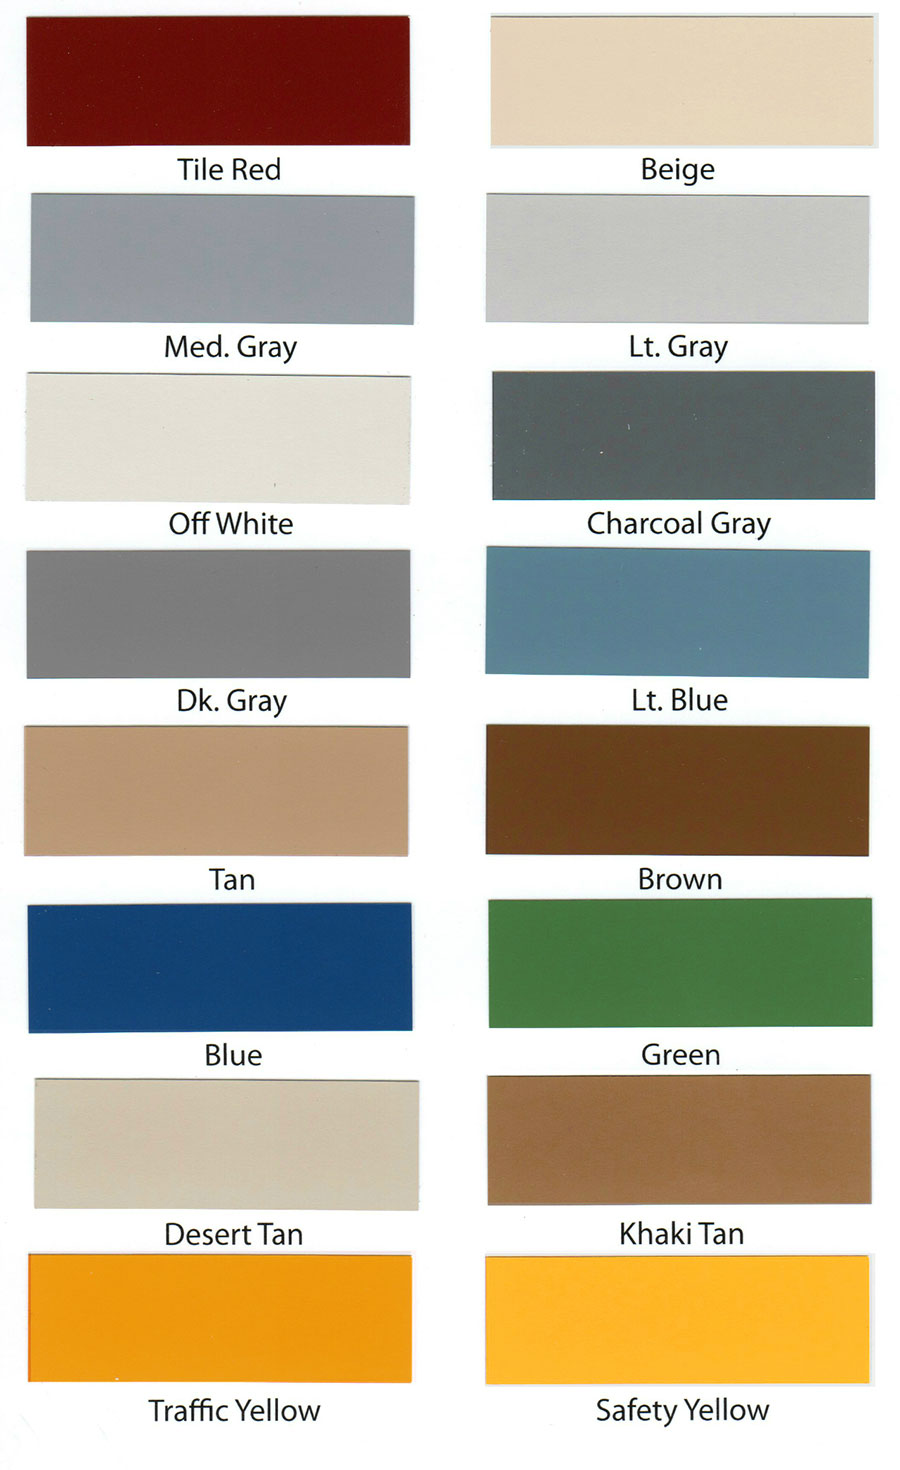
Next if you ordered more than one kit mix each of the Part A�s together to blend the colors. Once the Part A(s) have been mixed separately you may now mix the Part A and Part B together with the power mixer in your drill FOR 3 MINUTES MAKING SURE MIXER PRODUCES A GOOD VORTEX(do not mix at high speed though). Mix in a 2:1 Ratio of 2 parts A to one part B. Mix untill the color is even throughout the batch by moving the mixer up and down and side to side, there should be no streaks in the liquid mix. Mix only a small batch at first since the mixed epoxy starts to harden in about 45 minutes. Once mixed pour out a bead across the floor do not use a roller pan. With the squeegee spread the epoxy out evenly, make sure not to have any thick puddle areas. You may want to cut in along the walls with a good quality brush before squeegeeing the main part of the floor.
Continue until the floor is completely coated. The epoxy should be hard to the touch in approximately 8 hours depending on temperature and humidity.
Be careful to adhere to the 2:1 ratio, improper mixes will cause the epoxy not to harden or result in small sticky spots which are not covered under the guarantee.
NOTE: If using white you will have a primer in addition to the white epoxy. Mix the primer in a 1 part A to 1 part B ration and roller onto floor as you would conventional paint. Let dry and then apply epoxy as stated above.
If you are applying colored flakes to your floor, apply the flakes immediately after you finish applying the epoxy in each section. We recommend that you apply a section no more than 4' deep so as to facilitate the dispersing of the chips into the wet epoxy. Toss small amounts up into the air at a 45 degree angle from your body, let the chips float down randomly. Do not toss too many chips at once, better to apply a little at a time so that the chips form a nice even pattern. Once you are complete with the first section mix and apply the epoxy to the next section and apply the chips as recommended above.
Once the epoxy has dried to a rock hard finish, 8-12 hrs. Brush the chips vigorously to remove any loose or standing up chips from the floor. Then mix topcoat in can gently. The chips will add a texture to the floor but if your floor is going to be wet we recommend you use the nonskid additive.
If floor will not be wet you can omit using the nonskid. Pour in 1 pack of nonskid powder per gallon stir well. Pour into roller pan and roller on one even clear coat. Keep stirring can so as to keep the nonskid particles suspended. Topcoat should dry in 4-6 Hrs.


