


Heavy Tonnage Industrial Epoxy Floor System
Your package will come with rollers, mixers, high performance epoxy primer, heavy tonnage epoxy, mixing bucket and heavy duty squeegee. The only thing yu need to supply is some elbow grease and Xylene for clean up. Be sure to clean anything that is not suppose to be coated before it cures, once cured it can only be removed by mechanical means. Always wear gloves when apply the heavy tonnage epoxy!
One of the best endorsements of this product came from Crop Production Services(see image above) where they handle large trucks filled with heavy and caustic fertilizer. Our Heavy Tonnage epoxy system is the only epoxy floor coating they have found to stand up to the very heavy semi truck traffic and corrosive effects of the fertilizers they handle daily. It is now the standard epoxy coating for all their floors.
Here's another great example of how tough this epoxy is. Heavy repetitive foot traffic at this cruise ship immigration center has no effect on the floor. Color is the medium gray.  PLEASE NOTE that due to recent changes in VOC laws by the EPA certain states require the 'Low VOC' version. The Low VOC version is also a No Odor version making it perfect when installing in occupied areas or adjacent to occupied areas. Same fantastic ratings just no odor. Standard version has a strong odor for the primer and no odor for the epoxy since it is pure epoxy. Current states that require Low VOC are CA, CT, DE, IL, IN, MD, MA, ME, NJ, NY, OH, PA, RI, VA, KY and all of Canada. Orders shipping to these states require that the Low VOC Option be selected for the size kit you need in the Size Drop Down Box, orders to these states that have not selected the Low VOC option will be manually adjusted with the correct price when your order is processed.
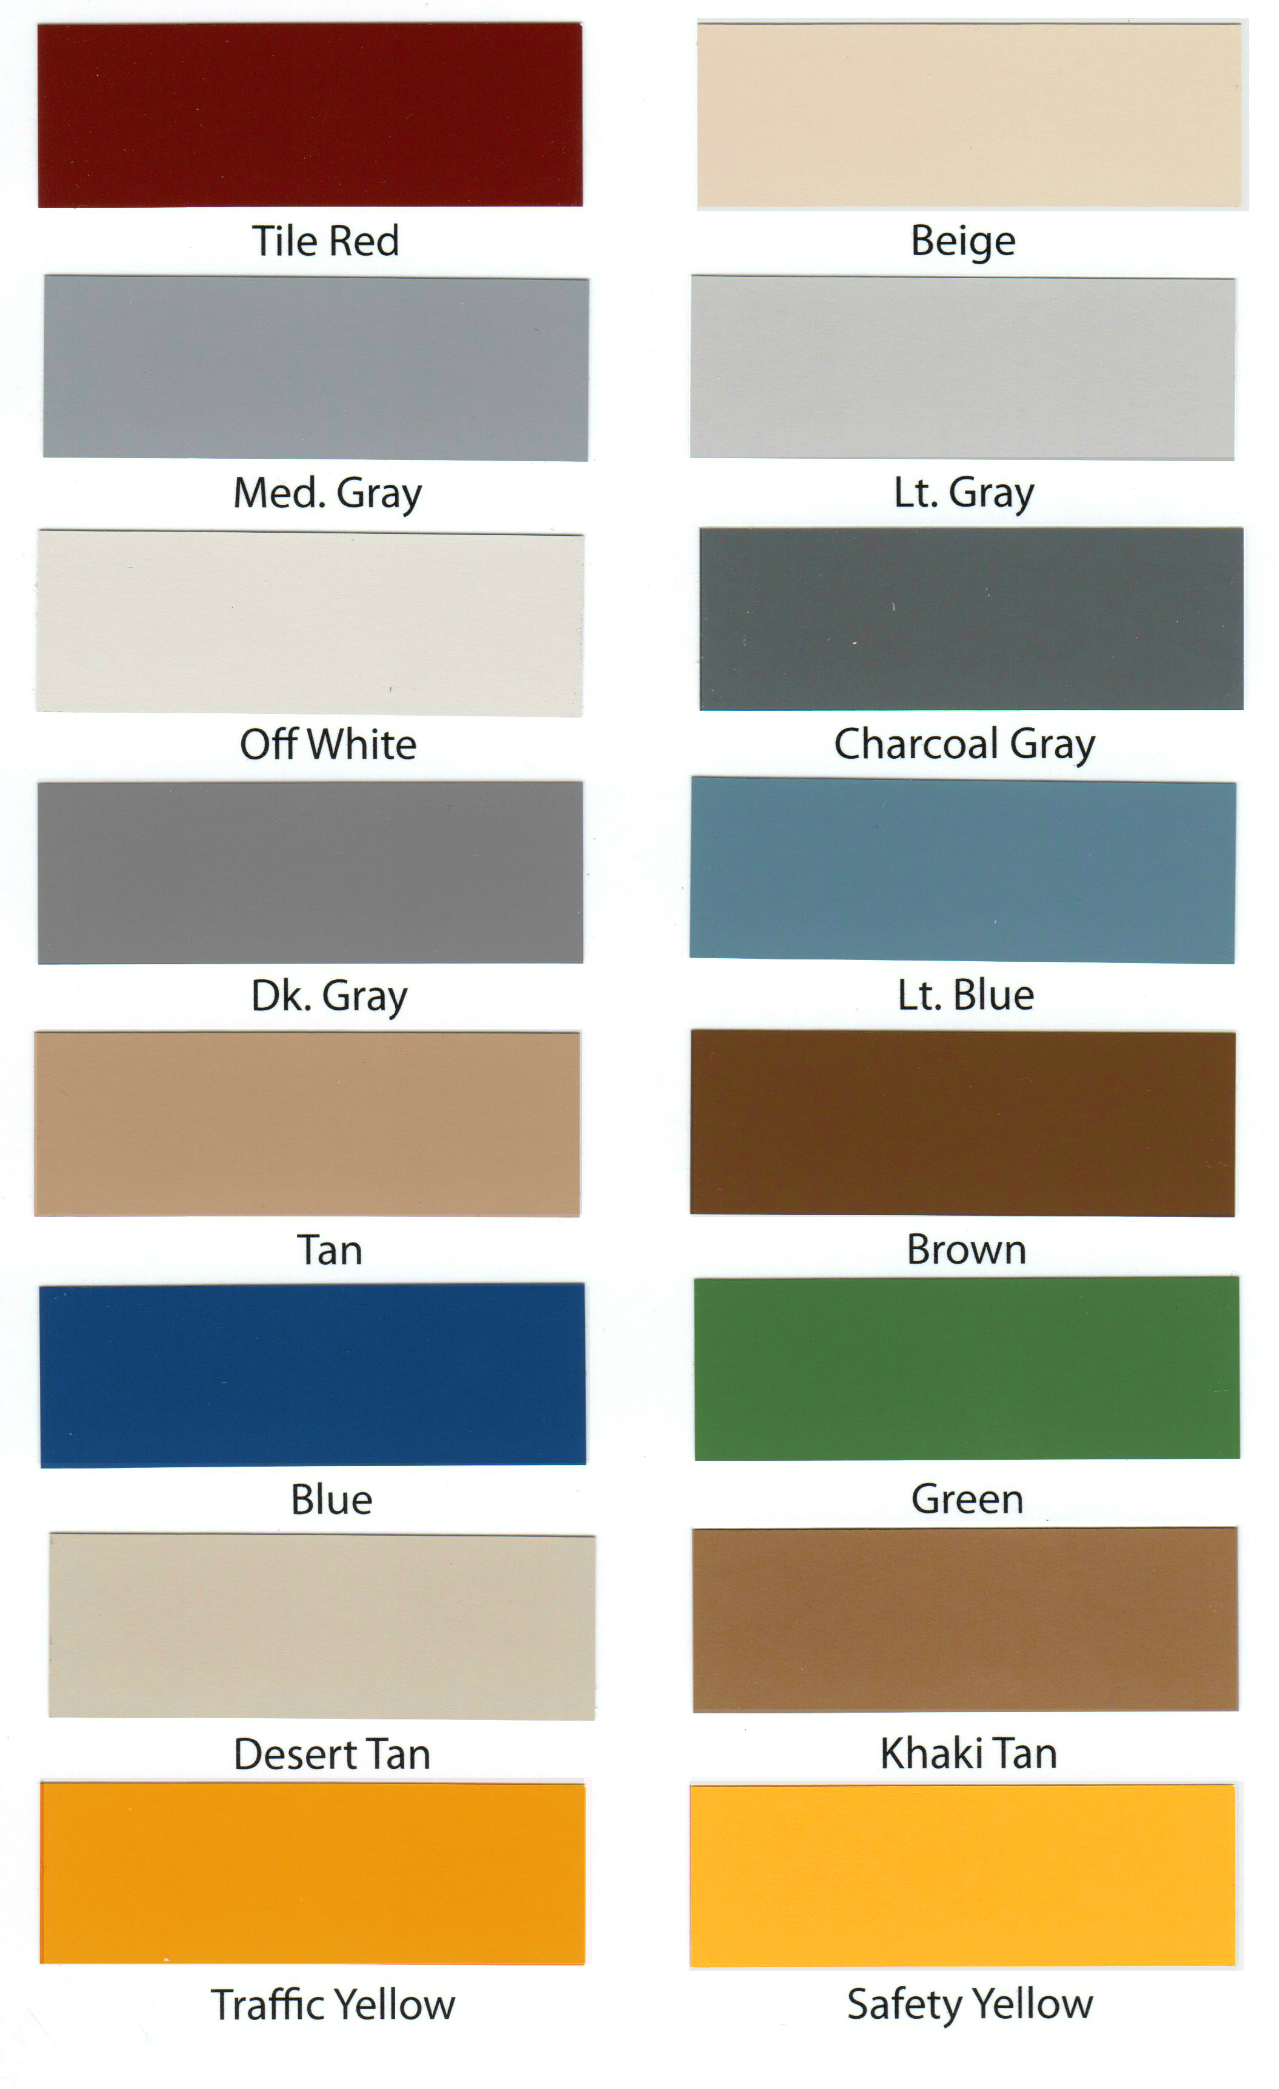
PLEASE NOTE THAT LIGHTER COLORS SUCH AS BEIGE, WHITE AND OFF WHITE MAY YIELD LESS COVERAGE.
While installation of the epoxy flooring system requires proper floor prepping. Many times installation can be accomplished while maintaining the facility in full service by doing the floor in sections. For faster installation use our No-Prep Instant Primer. That allows you to prime over minimally prepped concrete and epoxy over it 15 minutes later.
STEP 1 - Preferred method of preparation is a diamond grind to get the floor clean. For oil and grease stains scrub in some Liquid Tide with Muriatic acid, let acid work for 5-6 minutes then rinse off. Repeat as necessary and then rinse with TSP powder on the final rinse to neutralize. Repair any cracks or spalled concrete with one of our repair kits after cleaning. For heavily oil stained floors that cannot be cleaned select the oil primer option.
See this page HOW TO PREP AND EPOXY PAINT YOUR FLOOR for further preparation details.
STEP 2 - Apply the high performance epoxy primer coat or the oil primer if oil cannot be removed from floor completely.
STEP 3 - When primer is dry to the touch(5-6hrs) apply the epoxy at a 125 sf/gal rate. We recommend spreading the floor epoxy with our calibrated notched squeegee first then back rolling over it to smooth it out. Do not mix more than 1 gallon per person rolling. This is a high catalytic reaction epoxy and the more you mix the faster it sets up. Do not mix on high speed, this will infuse air into the epoxy. Make sure to move the mixer all around the bucket to ensure you mix all the epoxy at the bottom and edges of the bucket. After mixing the part A & B together transfer from mixing bucket to smaller pails and give it a quick remix. Then pour the epoxy directly on the floor in a bead from left to right, squeegee and back roll(Do Not Leave Mixed Epoxy In Bucket). Then repeat till done. For nonslip finish purchase 1 unit of heavy duty nonslip per 500 sf of floor, evenly broadcast the nonslip onto the epoxy after squeegeeing but before you back roll, this is where spike soles really come in handy(Included on orders of 2000sf or more). Once the floor epoxy is dry to the touch(8-12hrs) you can walk on it and put light traffic on it. Let floor cure for 2 days to reach full hardness before putting heavy vehicles on it.
If not using the No Prep Instant Primer grind or acid etch floor. New floors must be acid etched twice to ensure pores are open and concrete has the proper profile.Mix primer Part A & Part B at the indicated ratio on product label. Apply with supplied roller as you would regular paint. Allow primer to dry 4-8 hrs until dry to the touch without leaving a fingerprint.
If using the No Prep Instant Primer simply remove anything on the floor that can be separated such as dirt, dust oil or grease. Mix product in can to suspend nano tech particles and apply with the supplied pump sprayer. Allow to sit for 15 minutes till tacky. Then apply the Heavy Tonnage epoxy over the primer. Note primer must be coated with epoxy within 90 minutes. For larger floors apply primer and epoxy in sections. If the 90 minute over coat window is missed simply rough any part of the primer needed with 100 grit and reapply the primer.
Next mix the Heavy Tonnage epoxy in a two to one ratio with supplied mixing wand for 2-3 minutes. Do not mix more than you can apply in 30-40 minutes. Once mixed pour the epoxy directly onto floor in a left to right bead and squeegee up and down with the supplied calibrated squeegee. Do not try to roll out directly without squeegeeing first, this is epoxy is way too thick for that. If using nonslip additive mix in one pint per gallon of epoxy. Repeat until floor is done. Allow epoxy to dry over night. Light traffic next day. Heavy traffic the second day.
Using the no prep instant primer makes this system a one day application. Saves the cost of contractor grinding prices plus up to two days in time!!
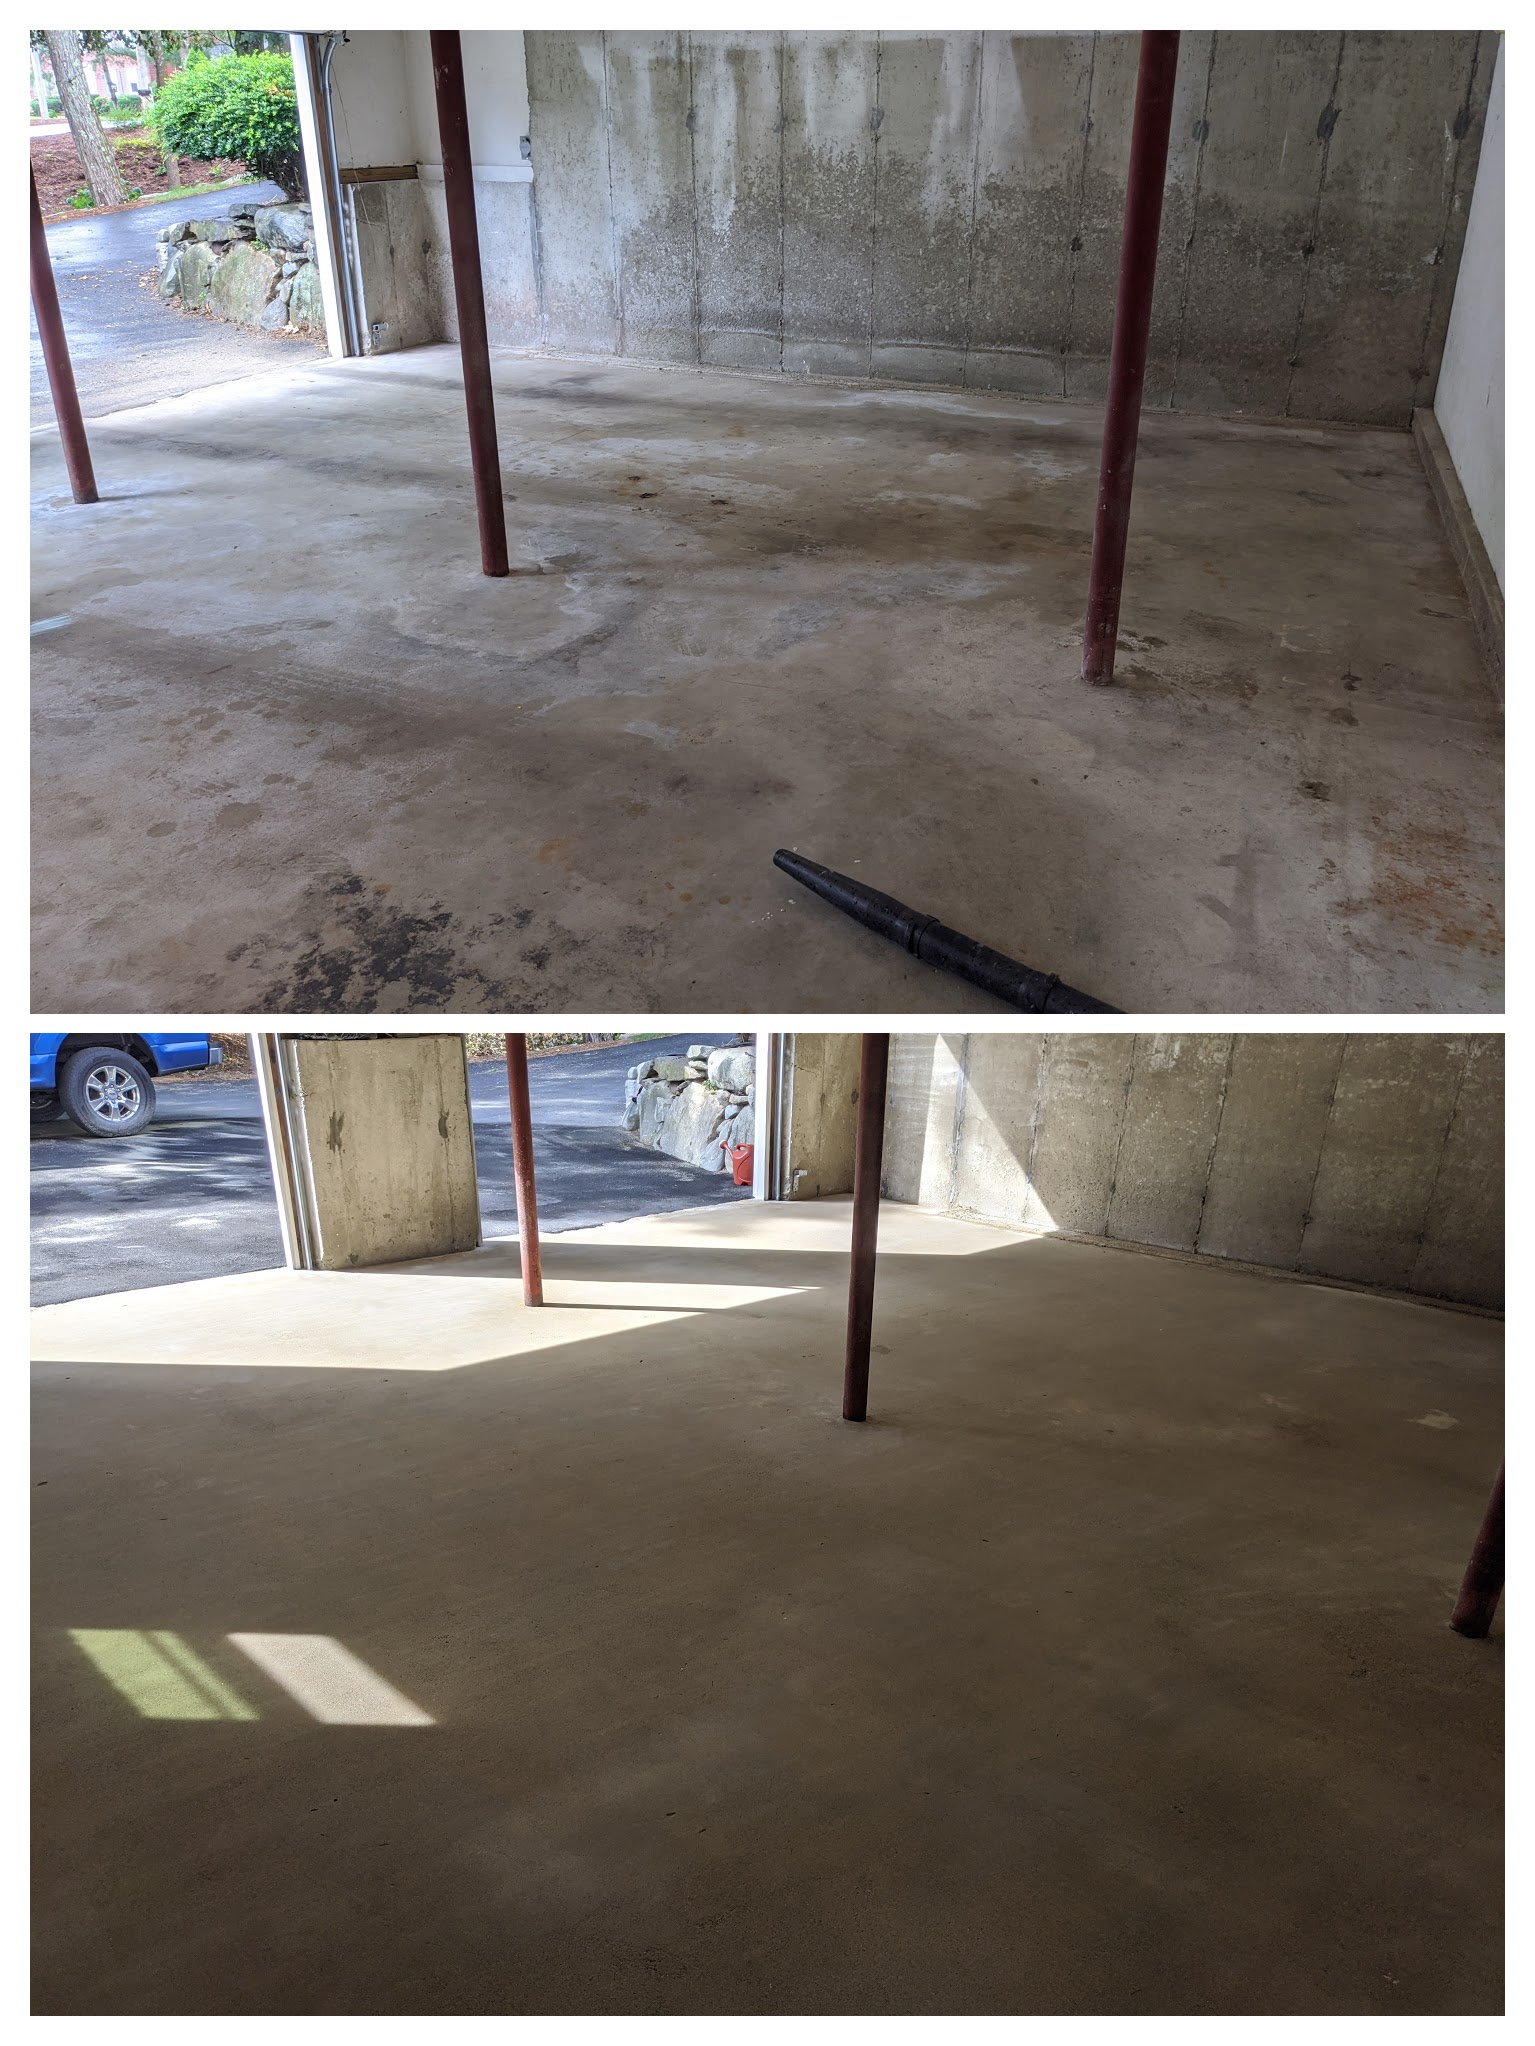
If your floor is newer and in good condition a double etching with a strong muriatic acid wash of 1 gallon of acid to 2 gallons of water for every 300 sf will also suffice. It's important that your floor looks like the cleaned floor below, even though this is a garage floor the concept for your industrial application is the same. The floor must be prepped properly.
THE FLOOR PREP MACHINE RENTED FROM HOME DEPOT DID A GREAT JOB, OIL STAINS WERE CLEANED WITH LIQUID TIDE AND MURIATIC ACID. FOR FLOORS LARGER THAN 3000 SF WE RECOMMEND YOU USE THE LARGEST COMMERCIAL GRINDING MACHINE YOU CAN RENT WITH NEW 25-30 DIAMOND BITS.