


EPOXY COAT ALL INDOOR ONLY KIT
Indoor Epoxy Coating For Wood & Tile Floors
Use this kit to epoxy coat any indoor surface. Bonds to any kind of tile, porcelain, ceramic, VCT tile, wood floors, metal or plastic surfaces. Complete with special primer, mixer, rollers, nonslip additive, instructions and Free Shipping. Coverage may vary depending on surface being covered.
We even have a Flexible Epoxy version for wood or concrete backerboard floors that have a higher than normal amounts of deflection. This allows you to coat floors that previously could never be coated due to cracking of the hard epoxy.
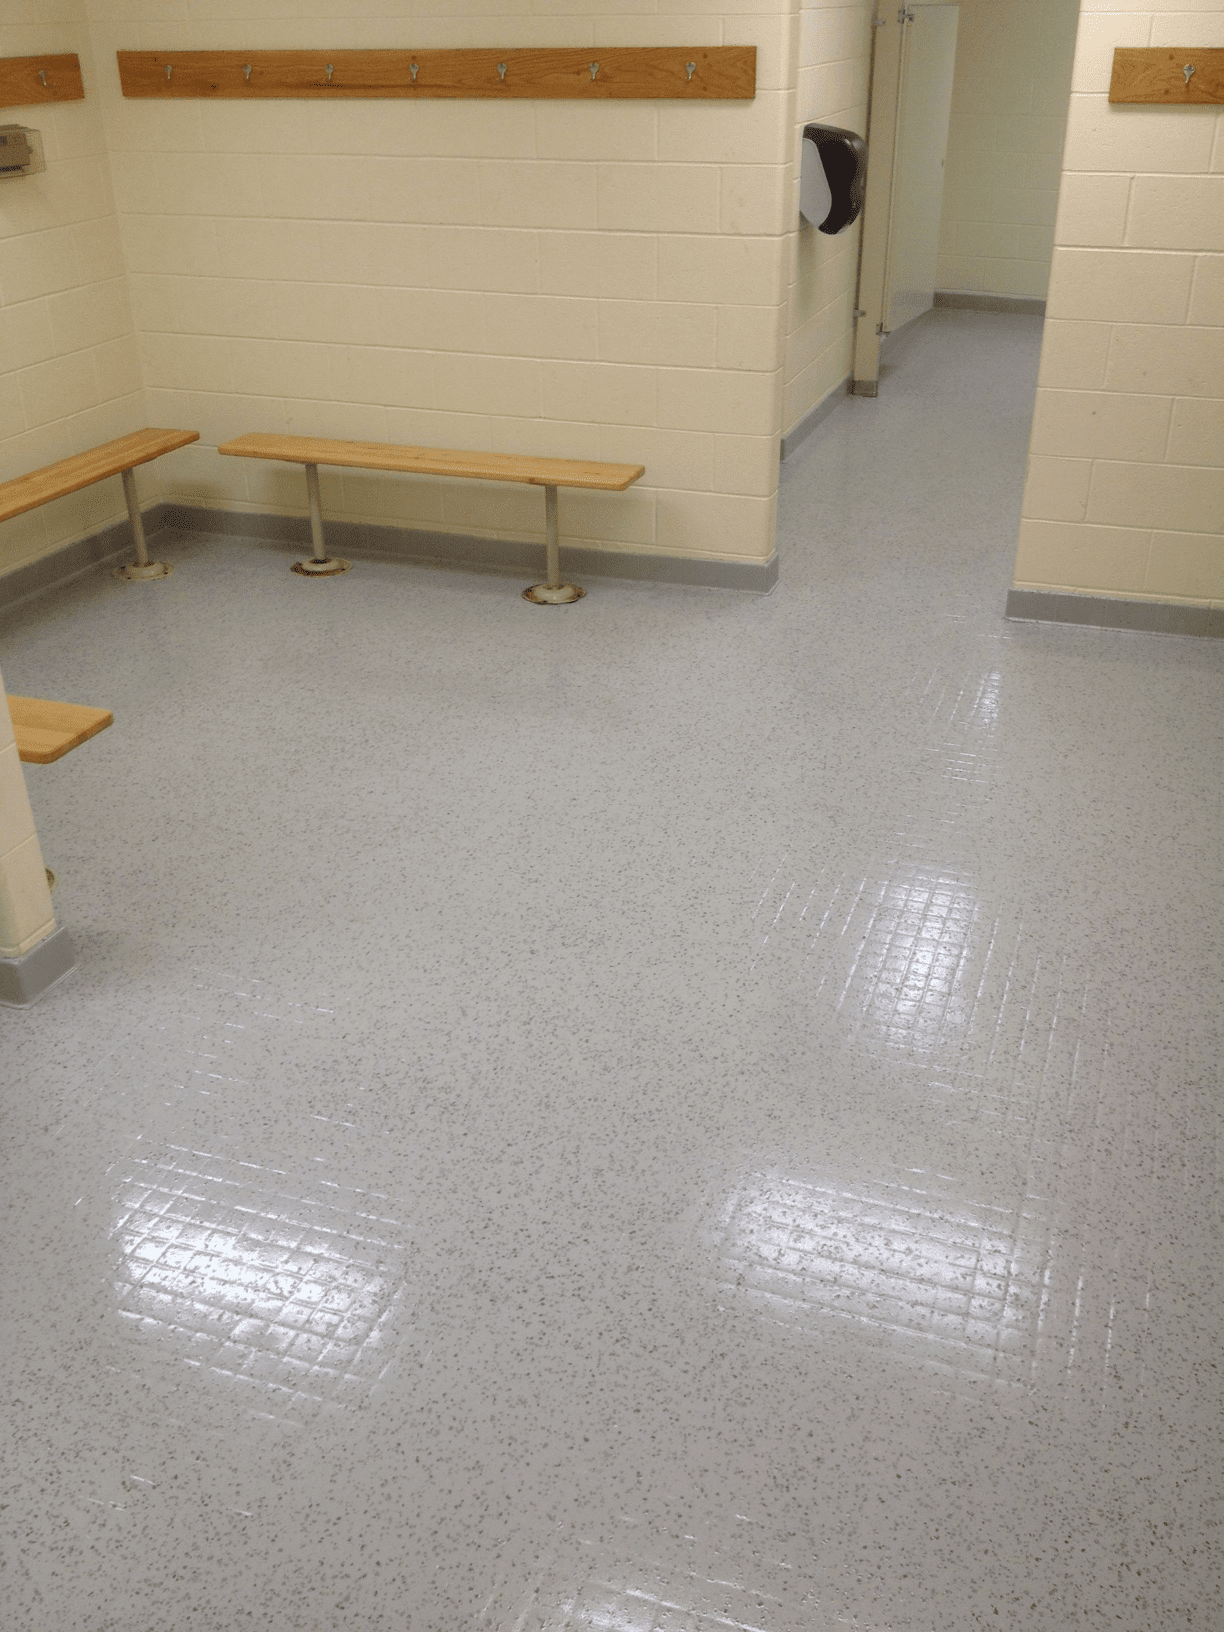
Great for Locker Rooms and Public Bathrooms where old ceramic tiles can be slippery and hard to maintain clean.
No costly and time consuming diamond grinding and new cement overlay. Simply sand to clean and rough up and apply the Coat All System! It's fast, easy and is super durable!
Easy to install using our clear and easy to follow instructions, no experience needed for professional results.
You can add in colored flakes to the epoxy for a terrazzo type finish, flakes are sold separately. Topcoat must be applied if using colored flakes.
For high traffic areas and added protection it's also recommended to use the topcoat. For light traffic use the standard topcoat for heavy traffic use Military Grade topcoat with this kit.
To hide grout lines order at least one set of the Extra Thick Epoxy for every Coat All Kit ordered. This allows you to fill in the grout lines first with a flat squeegee, please note that trying to fill in grout lines with a coating is extremely difficult and not an exact science and may require substantially more material than you think, we advise against it. Better to use a resurfacing slurry and than epoxy over that.
See Outdoor kit which is good for both indoor and outdoor surfaces. For larger floors please call for discount pricing.
Surface Preparation: Surface must be clean and dry, free from all grease, wax, oil, polish, loose paint, dirt, rust or other contamination. Clean with a strong abrasive detergent, rinse well and allow to dry.It is extremely important that the floor is clean and that you do a good rinse so that NO detergent residues are left on floor surface. Residues on the floor surfuce will affect the bonding of the epoxy. Scrub moldy or mildewed surfaces with bleach and rinse well. When priming hard, glossy surfaces, metal or pre-finished siding wipe down the surface with Xylene. Do not use mineral spirits, turpentine solvents that will leave oily residues. For very hard, glossy surfaces such as VCT, roughing the surface with silicon carbide sandpaper before applying the Bonder is necessary for best adhesion. Do not sand VCT tiles if they're asbestos! We recommend you do two coats of the Bonding Primer on VCT tiles. You can purchase additional Bonding Primer from link at bottom of page. For wood lightly sand to remove any Mil finish or other surface films. If coating over concrete, surface should be grinded or acid etched.
Building Material Plastic: More and more plastics are used in the building industry, including PVC sheeting and piping, vinyl shutters, vinyl molding and mill work. First, remove old and loose paint then clean away wax, polish, grease, oil and other contaminants from the surface with a strong abrasive detergent. Wipe the surface with a cleaning solvent such as xylene. Dry, then scuff sand the surface for maximum adhesion. Apply the primer. wait 3 hours and coat with Ultra Epoxy System.
Tile, Glazed Block and Brick, Porcelain: Decorative surfaces such as these can be restored and painted. First remove old paint and debris. Repair or patch any broken or damaged areas. Then clean away any wax, polish, grease, oil and other contaminants with a strong abrasive detergent. Wipe the surface with a cleaning solvent such as xylene. For maximum adhesion scuff sand with carbide sandpaper or etch the surface with Muriatic acid in a 2 parts water to 1 part acid mix. Sprinkle etching solution onto wet surface and scrub in, let sit for 10 minutes and then rinse well, sprinkle baking soda or TSP powder onto wet surface to neutralize acid and brush in then rinse well to remove any etching residues and allow to dry. Apply the primer and allow to dry for 3 hours then apply the epoxy. Not recommended for sinks, tubs or shower areas where continuous water or hot water can be present. Note: where flexible seams or soft caulking are present, do not paint over with the primer, fill in any cracks or spalls with Armor Crack & Joint Compound and allow to cure overnight before priming.
Metals: when painting metal surfaces. Clean away all corrosion and any old paint, dirt, wax and grease. Wipe the surface with a cleaning solvent such as xylene. Allow to dry then apply the primer (only one coat is required) Allow the primer to dry for three hours, then apply the epoxy.
Wood or Hardy Backerboard New wood should be lightly sanded to remove any Mil finish, old wood should be rough sanded to till it's clean. Thoroughly clean off all dust. It is important that the seams are addressed properly. You can either fill in the seams and screw heads(screw heads should be countersunk) with Bondo and then sanded flat. Or for floors with more deflection than normal you can first prime the wood with our Bonding Primer then after the Bonding Primer dries apply our Epoxy flooring Primer and embed 6" mesh over the seams making sure that you completely cover the mesh with the primer and the mesh is installed flat and tight to the wood. Mix Epoxy Flooring primer according to the ratio on front label of cans. Apply with 3/8" nap roller as you would regular paint. Do not mix more than one gallon at a time to avoid premature hardening. Let dry for approximately 5-6 hours and then apply the Flexible epoxy. All epoxy to dry overnight if using a topcoat for added protection.
How to Apply Bonding Primer: Mix well in can. Apply this primer by synthetic fiber brush, 3/8 nap lint free roller or by spray. The temperature of the surface and the surrounding air should be between 35 deg. F and 100 deg. F. It will dry to touch in about 1-2 hrs under standard conditions (77 deg. F and 50% relative humidity). Thicker coats will take longer to dry. Primer can be top-coated in 3-4 hours after application. When top coating with 2-component epoxy paints allow 24 hours before painting. Do not paint in direct sun or on a hot surface. Stop application two hours before a heavy dew or rain. If possible plan your painting to avoid rain, moisture and high humidity for the first 24 hours of curing. Primer covers about 450 square feet per gallon. Caulk seams and edges after priming. For VCT tiles, two coats are required.
Clean-Up: Clean-up with soap and water. If the primer �sets-up�, or when cleaning up splatters or spills use warm water or lacquer thinner.
Ultra( Indoor) Epoxy Application: Apply for indoor use only. Be sure to allow 24 hrs for primer to cure before applying epoxy! With each 300 SF kit you should receive one -1.5 gallon set of epoxy and with each 600 sq ft kit you should receive one - 3gallon set. Mix each can individually. Epoxy gets mixed in a 2 Parts A to 1 Part B ratio. DO NOT MIX ALL THE EPOXY AT ONCE. This is not like off the shelf store bought epoxy. Mixing too much at once will cause too much catalytic reaction and premature hardening of the epoxy which is not covered under the warranty. Rule of thumb is, mix no more than 1 gallon of combined epoxy parts per person rolling. Mix each 1.5 gallon set in 2 batches, mix each 3 gallon set in 3-4 batches. Use measuring containers to pour out portions of Part A and Part B. Accurate measurement is required for epoxy to cure properly, improper measurements will results in tacky spots which are not covered by warranty. Pour measured amounts into a mixing bucket using stirring stick to scrape material out of measuring containers. Mix product in mixing bucket with the jiffy mixer in a power drill on medium speed for 3-4 minutes moving mixing wand up, down and all round the sides to ensure complete mix. Pour a bead of epoxy from left to right and using a good quality 3/8" nap roller, roller product out in an even coating. If using a notched squeegee, spread epoxy out first with squeegee and then back roll over epoxy. Do not apply too thick. it is not necessary to apply in an overly thick coat. 3 gallons should cover aprox 575-625 sq ft. Hard to reach areas and vertical surfaces may be coated by brush. Work time is 35-45 minutes so do not leave mixed epoxy in mixing bucket or unattended. Premature hardening is not covered by the warranty.
If using colored chips, sprinkle chips into each wet epoxy section. Toss small amounts into air and allow to fall randomly. Avoid handling and tossing too many chips at once to avoid clumps and blotches of chips. Using spiked soles to walk in wet epoxy while dispersing chips works best. Remember you can always add in a few chips but if you toss too many at once, you can't get them out. Scrape chips flat prior to applying topcoat. You can use any type of flat plastic or fiberglass blade, such as a shovel. Don't worry about scratching epoxy, any scratches will disappear with the application of the topcoat.
Repeat till surface is coated. If taping off any areas use Gorilla Tape and remove slowly as soon as epoxy is dry to the touch. Allow overnight curing for foot traffic, allow 48 hours for furniture placement. For wet areas mix in nonslip additive at the rate of 1 units per 3 gallons of epoxy if not using topcoat. If using topcoat mix in one unit per gallon of topcoat. Mix frequently to prevent settling and blotches of nonslip additive in the finish. Use a roller, do not pour topcoat from roller pan or can with nonslip, this will result in blotches of nonslip that can dull the finish. For heavily trafficked areas or if color chips were used we recommend top coating with our clear topcoat. Apply topcoat within 24 hours of epoxy. Mix nonslip additive into can and stir continuously to keep particles suspended. Pour product from can into rolling pan and roller on like conventional paint.
If using the Military grade topcoat(Red Label Can), one coat only is applied. If using the indoor odorless topcoat(UltraGlaze) you can do two coats, apply the nonslip to the topcoat in the second coat. Note: You do not have to use the nonslip additive for indoor applications but be advised If the floor will get wet then we recommend you use the nonslip additive since the topcoat is nonporous and is very slippery when wet without the nonslip additive. If not using the nonslip additive you must clean up any spills immediately since the epoxy does become slippery when wet.
For VCT tiles a minimum of two primer coats are required, please call us when doing a VCT floor.
For wood floors any all wax or clear coats must be sanded off first. If your floor has a lot of deflection in it we strongly suggest you choose the Flexible Epoxy version to avoid cracking. Our Flexible Epoxy offers an amazing half inch in deflection without cracking.
For filling in grout lines please note that it's not an exact science in determining how much product you will need to completely hide your grout lines. It depends on how deep the grout lines are and what type of grout was used. So best to er on the safe side rather than come up short.


